The allure of a new iPhone is undeniable. The sleek design, the cutting-edge camera, the buttery-smooth performance—it’s a powerful combination. However, with flagship models consistently pushing well past the $1,000 mark, the price tag can be a significant barrier. This is where the burgeoning market for used and refurbished iPhones comes in, offering a savvy way to get a premium Apple experience without the premium cost.
In 2025, the second-hand market is more mature and appealing than ever. Models like the formidable iPhone 13 Pro or the powerful iPhone 14 are now available at compelling prices, offering features that still feel modern and capable. But this vibrant marketplace is not without its pitfalls. For every fantastic deal, there’s a potential dud—a phone with hidden damage, a failing battery, or worse, one that’s been blacklisted or is still locked to a previous owner.
Navigating this landscape requires more than just a keen eye for a good price; it demands a methodical approach and a specific set of checks. This guide is your comprehensive playbook. We will break down the five most critical inspections you must perform before handing over your hard-earned cash. From a deep hardware dive to digital forensics, these tips will empower you to buy with confidence, avoid scams, and secure an iPhone that will serve you well for years to come.
Before You Buy: Understanding “Used” vs. “Refurbished”

First, it’s essential to understand the distinction between “used” and “refurbished,” as the terms are often used interchangeably but carry different implications for you as a buyer.
Used iPhones:
A “used” iPhone is typically sold by its previous owner directly to you, often through a peer-to-peer platform like Facebook Marketplace, Craigslist, or Swappa.
-
Pros: This is often where you’ll find the lowest prices, as there’s no middleman taking a cut. You can negotiate directly with the seller.
-
Cons: This is the riskiest route. The phone is sold “as-is” with no warranty or guarantee of its condition beyond what you can verify yourself. There’s little to no recourse if a problem arises after the sale.
Refurbished iPhones:
A “refurbished” iPhone has been sold or returned to a company, which then professionally inspects, cleans, repairs, and repackages it for resale.
-
Pros: This is a much safer option. Reputable refurbishers perform multi-point inspections, replace failing components (like the battery), and provide a warranty (typically ranging from 30 days to a full year).
-
Cons: Refurbished phones are generally more expensive than their privately-sold used counterparts to cover the costs of inspection, repair, and the provided warranty.
Tiers of Refurbished:
Not all refurbishers are created equal. The gold standard is Apple Certified Refurbished. These devices are restored by Apple itself, come with a brand-new battery and outer shell, include all original accessories, and are backed by a one-year Apple warranty. For all intents and purposes, they are like new.
Reputable third-party refurbishers like Back Market, Gazelle, and Amazon Renewed offer a great middle ground. They have strict vetting processes for their sellers, provide detailed grading systems (e.g., “Excellent,” “Good,” “Fair”) to describe cosmetic condition, and offer solid warranties and return policies. When buying refurbished, always prioritize sellers who are transparent about their process and stand behind their products with a warranty.
Where to Buy Your iPhone in 2025
-
Apple Certified Refurbished Store: The safest, most reliable option. The price is higher, but the peace of mind is unparalleled.
-
Reputable Online Retailers (Back Market, Gazelle, Swappa): Excellent balance of price and security. Swappa is unique in that it’s a moderated peer-to-peer marketplace that checks the device’s IMEI before a listing can go live, reducing the risk of buying a blacklisted phone.
-
Peer-to-Peer Marketplaces (Facebook Marketplace, Craigslist): The cheapest but riskiest. Only use this option if you can meet the seller in a safe, public place and are prepared to run through the entire inspection checklist detailed below.
-
Wireless Carriers (AT&T, Verizon, T-Mobile): They often sell “Certified Pre-Owned” devices that have been inspected and come with a limited warranty. These can be a good option, especially if you’re already a customer.
The 5-Point Pre-Purchase Inspection Checklist
Whether you’re meeting a seller in a coffee shop or unboxing a delivery from a refurbisher, these five checks are non-negotiable.
Tip #1: The Comprehensive Hardware Check
This is the most hands-on part of the process. You need to physically and functionally inspect every aspect of the iPhone.
1. External Examination:
Hold the phone and examine it under good light. Look for:
-
Scratches: Minor scuffs on the body are normal for a used device, but deep scratches on the screen or camera lenses are red flags.
-
Dents and Bends: Check the corners for dents from drops. Most importantly, lay the phone on a flat surface to check if the frame is bent. A bent frame can cause internal stress on the logic board and display.
-
Screen Condition: Look for any signs of the screen lifting or separating from the frame (delamination). Check for cracks, even hairline ones, which can compromise water resistance.
2. Power On & Activation Lock:
This is the single most important step. If a phone is Activation Locked, it is a useless brick to anyone but the original owner.
-
Turn the phone on. If it goes straight to the home screen, it’s a good sign, but you must still verify the lock is off.
-
Go to Settings > General > Transfer or Reset iPhone > Erase All Content and Settings.
-
CRITICAL STEP: The phone will ask for the current owner’s Apple ID password to turn off “Find My” and erase the device. The seller must be able to enter this password. If they cannot, walk away immediately. The phone is likely stolen or they’ve forgotten their password, and it will be unusable for you.
3. Screen and Display Functionality:

-
Touch Response: On the home screen, press and hold an app icon until it jiggles, then drag it across every part of the screen. If it drops or stutters in a specific area, that part of the touchscreen is faulty.
-
Dead Pixels & Discoloration: Open a blank white image (you can just search for one in Safari) and a blank black image. Look for any pixels that are stuck on one color or are not lit at all. Check for any yellowing or blue tint around the edges.
-
True Tone: Go to the Control Center (swipe down from the top right). Press and hold the brightness slider. The “True Tone” option should be present and toggleable. If it’s missing, the screen is likely a non-genuine replacement.
4. Buttons, Switches, Ports, and Biometrics:
-
Buttons: Click the volume up, volume down, and side (power) buttons. They should have a firm, tactile click, not feel mushy or stuck.
-
Mute/Action Switch: Flip the switch on the side. It should provide haptic feedback and show the on-screen mute/unmute confirmation. On iPhone 15 Pro models, test the Action Button’s functionality.
-
Cameras: Open the Camera app. Switch between all lenses (0.5x, 1x, 2x/3x). Take a photo and video with both the rear and front cameras. Check for any dark spots, which could indicate dust on the sensor.
-
Speakers and Microphones: Record a short video while speaking clearly. Play it back to check both the playback speaker and the recording microphone. Make a test call if a SIM is available.
-
Charging Port: Inspect the port for lint or debris. Plug in a charging cable and ensure the charging indicator appears.
-
Face ID / Touch ID: Go to Settings > Face ID & Passcode (or Touch ID). Try to set up a new face or fingerprint. If it fails or says “Unable to activate Face ID on this iPhone,” it’s a sign of a critical hardware failure, often due to a botched screen repair. This is a major red flag.
Tip #2: The Digital Background Check: IMEI & Serial Number
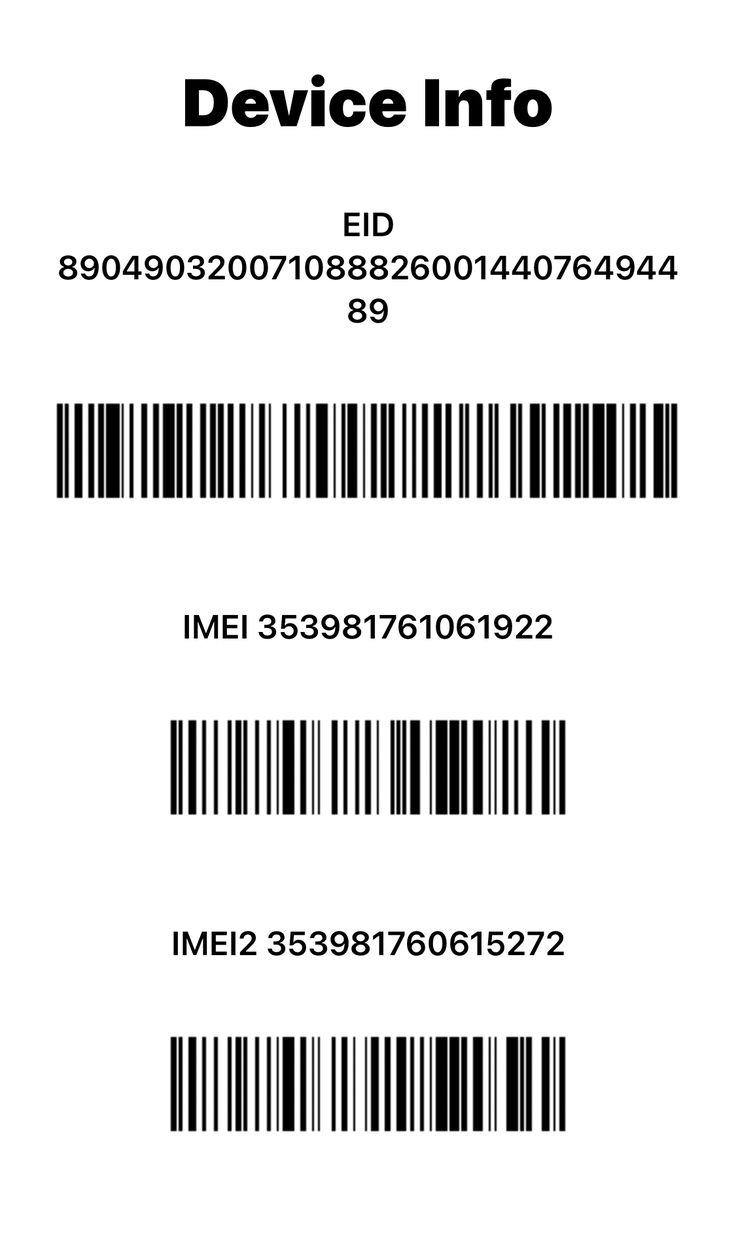
The IMEI (International Mobile Equipment Identity) is your phone’s unique 15-digit fingerprint. Checking it can reveal the device’s hidden history.
1. How to Find the IMEI:
-
The quickest way is to open the Phone app and dial #06#. A “Device Info” screen will pop up.
-
Alternatively, go to Settings > General > About and scroll down.
-
For older models, it may also be printed on the SIM tray or the back of the device.
2. What to Do with the IMEI:
Use a free online IMEI checker. Websites like iunlocker.com (as shown in the video), IMEI.info, or Swappa’s checker are excellent resources. Enter the IMEI number.
3. What You’re Looking For:
-
Blacklist Status: This tells you if the phone has been reported lost or stolen by a carrier. A blacklisted phone will not be able to get cellular service. This should show as “Clean.”
-
Find My iPhone Status: This is another way to check for Activation Lock. It should be “OFF.”
-
Carrier Lock Status: This tells you if the phone is locked to a specific carrier (e.g., AT&T). If it is, you’ll only be able to use it with that carrier unless you get it unlocked. “Unlocked” is ideal.
-
Estimated Purchase Date: This helps verify the age of the device and cross-reference the seller’s claims.
Tip #3: Uncovering the Repair History
Since the release of iOS 15.2, Apple has provided a way to see if key components have been replaced. This is an invaluable tool for a used-phone buyer.
1. Where to Find It:
Go to Settings > General > About. If any parts have been replaced, a “Parts and Service History” section will appear below the serial number. If you don’t see this section, it means no key parts have been detected as replaced.
2. Decoding the History:
The system will show you the status of the battery, display, and camera (depending on the iPhone model).
-
“Genuine Apple Part”: This is the best-case scenario. It means the repair was done using an official Apple component, likely by Apple or an Apple Authorized Service Provider.
-
“Unknown Part”: This is a red flag, but not necessarily a deal-breaker. It means the component is not a genuine Apple part. This could be a lower-quality third-party replacement.
3. The Implications:
-
Functionality: Non-genuine parts can cause issues. An “Unknown Part” battery won’t show its health percentage. An “Unknown Part” display may have poor color accuracy, lower brightness, and will lose True Tone functionality. An “Unknown Part” camera may not perform as expected.
-
Negotiation: If you see an “Unknown Part” message, you should use it as a significant point of negotiation. The phone is inherently less valuable than one with all-original or genuine replacement parts.
Tip #4: Assessing the Battery Health
A phone’s battery is a consumable component; it degrades over time. Knowing its health is crucial to understanding how long it will last on a charge and whether you’ll need to budget for a replacement.
1. Where to Find It:
Go to Settings > Battery > Battery Health & Charging.
2. Understanding “Maximum Capacity”:
This percentage represents the battery’s current full-charge capacity compared to when it was new. It is not the current charge level. A brand-new iPhone shows 100%.
3. The Magic Numbers for 2025:
-
90% and above: Excellent. The battery has seen very little degradation.
-
85% – 89%: Good. The phone has been used but still holds a solid charge. This is a common and perfectly acceptable range for a phone that’s a year or two old.
-
80% – 84%: Fair. You will likely notice the battery draining faster than a new device. It’s usable, but you should factor in the cost of a future battery replacement (around
70−100 from Apple).
-
Below 80%: Poor. Apple considers a battery “consumed” below 80%. The phone will display a “Service” message, and its performance may be throttled to prevent unexpected shutdowns. If the battery is below 80%, the phone’s price should be reduced by at least the cost of a replacement.
Tip #5: The Hidden Killer: Checking for Water Damage
Modern iPhones are water-resistant, not waterproof. That resistance can fail, especially on an older device or one that’s been repaired. Water damage can cause insidious, delayed-reaction problems like corrosion that kill the phone weeks or months after you buy it.
1. Find the Liquid Contact Indicator (LCI):
Every iPhone has a small sticker inside that changes color when it comes into contact with liquid. It’s located inside the SIM card slot.
2. How to Check:
-
Use the SIM ejector tool to pop out the SIM tray.
-
Shine a flashlight into the empty slot.
-
You are looking for a small indicator strip inside.
3. What to Look For:
-
White or Silver: The indicator is normal and has not been activated. The phone is likely free of liquid damage.
-
Pink or Red: The indicator has been tripped. The phone has been exposed to liquid.
The Verdict:
If the LCI is red, do not buy the phone. There are no exceptions to this rule. The risk of future catastrophic failure is far too high, and no warranty (Apple’s or a refurbisher’s) will ever cover liquid damage. Politely decline the sale and walk away.
Conclusion: Your Quick-Fire Checklist for a Confident Purchase
Buying a used or refurbished iPhone in 2025 is one of the smartest tech purchases you can make, provided you do your homework. By using this five-point inspection, you transform yourself from a hopeful buyer into an informed inspector. You are no longer just looking at the price; you are assessing the device’s true condition, history, and value.

